

Deploy an ECC
In the previous tutorial we learnt how to build our ECC. We completed the tutorial with a confirmation from Dijets-CLI tool
that the configuration file for our newly built ECC was successfully generated.
We can now use the same configuration file and deploy our ECC running on a local dijets test network.
The details we specified in the previous tutorial for building the ECC Blockchain network were as follows:
- ECC Name: Mimo
- Token Symbol: IMO
- Chain ID: 2222
- Gas Limit: 8000000
To deploy our ECC on a local Dijets Test Network run:
dijets ecc deploy mimo
Make sure to substitute the name of your ECC if you used a different one than mimo.
Next, select Local Network.
This command boots a five node Dijets network on your machine. It needs to download the latest versions of DijetsNodeGo and ECC-EVM. The command may take a couple minutes to run.
As shown in the video above, the command output should look something like as follows:
_33> dijets ecc deploy mimo_33✔ Local Network_33Deploying [mimo] to Local Network_33Installing ecc-evm-v0.4.3..._33ecc-evm-v0.4.3 installation successful_33Backend controller started, pid: 36257, output at: /Users/saleemfareed/.dijets-cli/runs/server_20230217_042308/dijets-cli-backend_33Installing dijetsnodego-v1.9.0..._33dijetsnodego-v1.9.0 installation successful_33VMs ready._33Starting network..._33..........Virtual Machines ready ✔ -- ECC Zone assigned ✔ -- Blockchain Network is live ✔_33......_33Network ready to use. Local network node endpoints:_33+-------+----------+------------------------------------------------------------------------------------+_33| NODE | VM | URL |_33+-------+----------+------------------------------------------------------------------------------------+_33| node2 | mimo | http://127.0.0.1:9652/ext/bc/SPqou41AALqxDquEycNYuTJmRvZYbfoV9DYApDJVXKXuwVFPz/rpc |_33+-------+----------+------------------------------------------------------------------------------------+_33| node3 | mimo | http://127.0.0.1:9654/ext/bc/SPqou41AALqxDquEycNYuTJmRvZYbfoV9DYApDJVXKXuwVFPz/rpc |_33+-------+----------+------------------------------------------------------------------------------------+_33| node4 | mimo | http://127.0.0.1:9656/ext/bc/SPqou41AALqxDquEycNYuTJmRvZYbfoV9DYApDJVXKXuwVFPz/rpc |_33+-------+----------+------------------------------------------------------------------------------------+_33| node5 | mimo | http://127.0.0.1:9658/ext/bc/SPqou41AALqxDquEycNYuTJmRvZYbfoV9DYApDJVXKXuwVFPz/rpc |_33+-------+----------+------------------------------------------------------------------------------------+_33| node1 | mimo | http://127.0.0.1:9650/ext/bc/SPqou41AALqxDquEycNYuTJmRvZYbfoV9DYApDJVXKXuwVFPz/rpc |_33+-------+----------+------------------------------------------------------------------------------------+_33_33Browser Extension connection details (any of the URLs generated above should work):_33RPC URL: http://127.0.0.1:9650/ext/bc/SPqou41AALqxDquEycNYuTJmRvZYbfoV9DYApDJVXKXuwVFPz/rpc_33Funded address: 0x8db97C7cEcE249c2b98bDC0226Cc4C2A57BF52FC with 1000000 (10^18) - private key: 56289e99c94b6912bfc12adc093c9b51124f0dc54ac7a766b2bc5ccf558d8027_33Network name: mimo_33Chain ID: 2222_33Currency Symbol: IMO
You can use the deployment details to connect to and interact with your ECC. Now that the ECC has been deployed on a local test network, we can start interacting with it.
Interacting with Your ECC#
You can use the value provided by Browser Extension connection details to connect to your ECC
with MetaMask, Decypher or any other wallet.
_10Browser Extension connection details (any of the URLs generated above should work):_10RPC URL: http://127.0.0.1:9650/ext/bc/SPqou41AALqxDquEycNYuTJmRvZYbfoV9DYApDJVXKXuwVFPz/rpc_10Funded address: 0x8db97C7cEcE249c2b98bDC0226Cc4C2A57BF52FC with 1000000 (10^18) - private key: 56289e99c94b6912bfc12adc093c9b51124f0dc54ac7a766b2bc5ccf558d8027_10Network name: mimo_10Chain ID: 2222_10Currency Symbol: IMO
Using Metamask to connect to your ECC#
Now that you have learnt how to deploy your ECC using ECCVM Cli tool. You can connect Metamask to an ECC as shown below.
For this example we will use the following details:
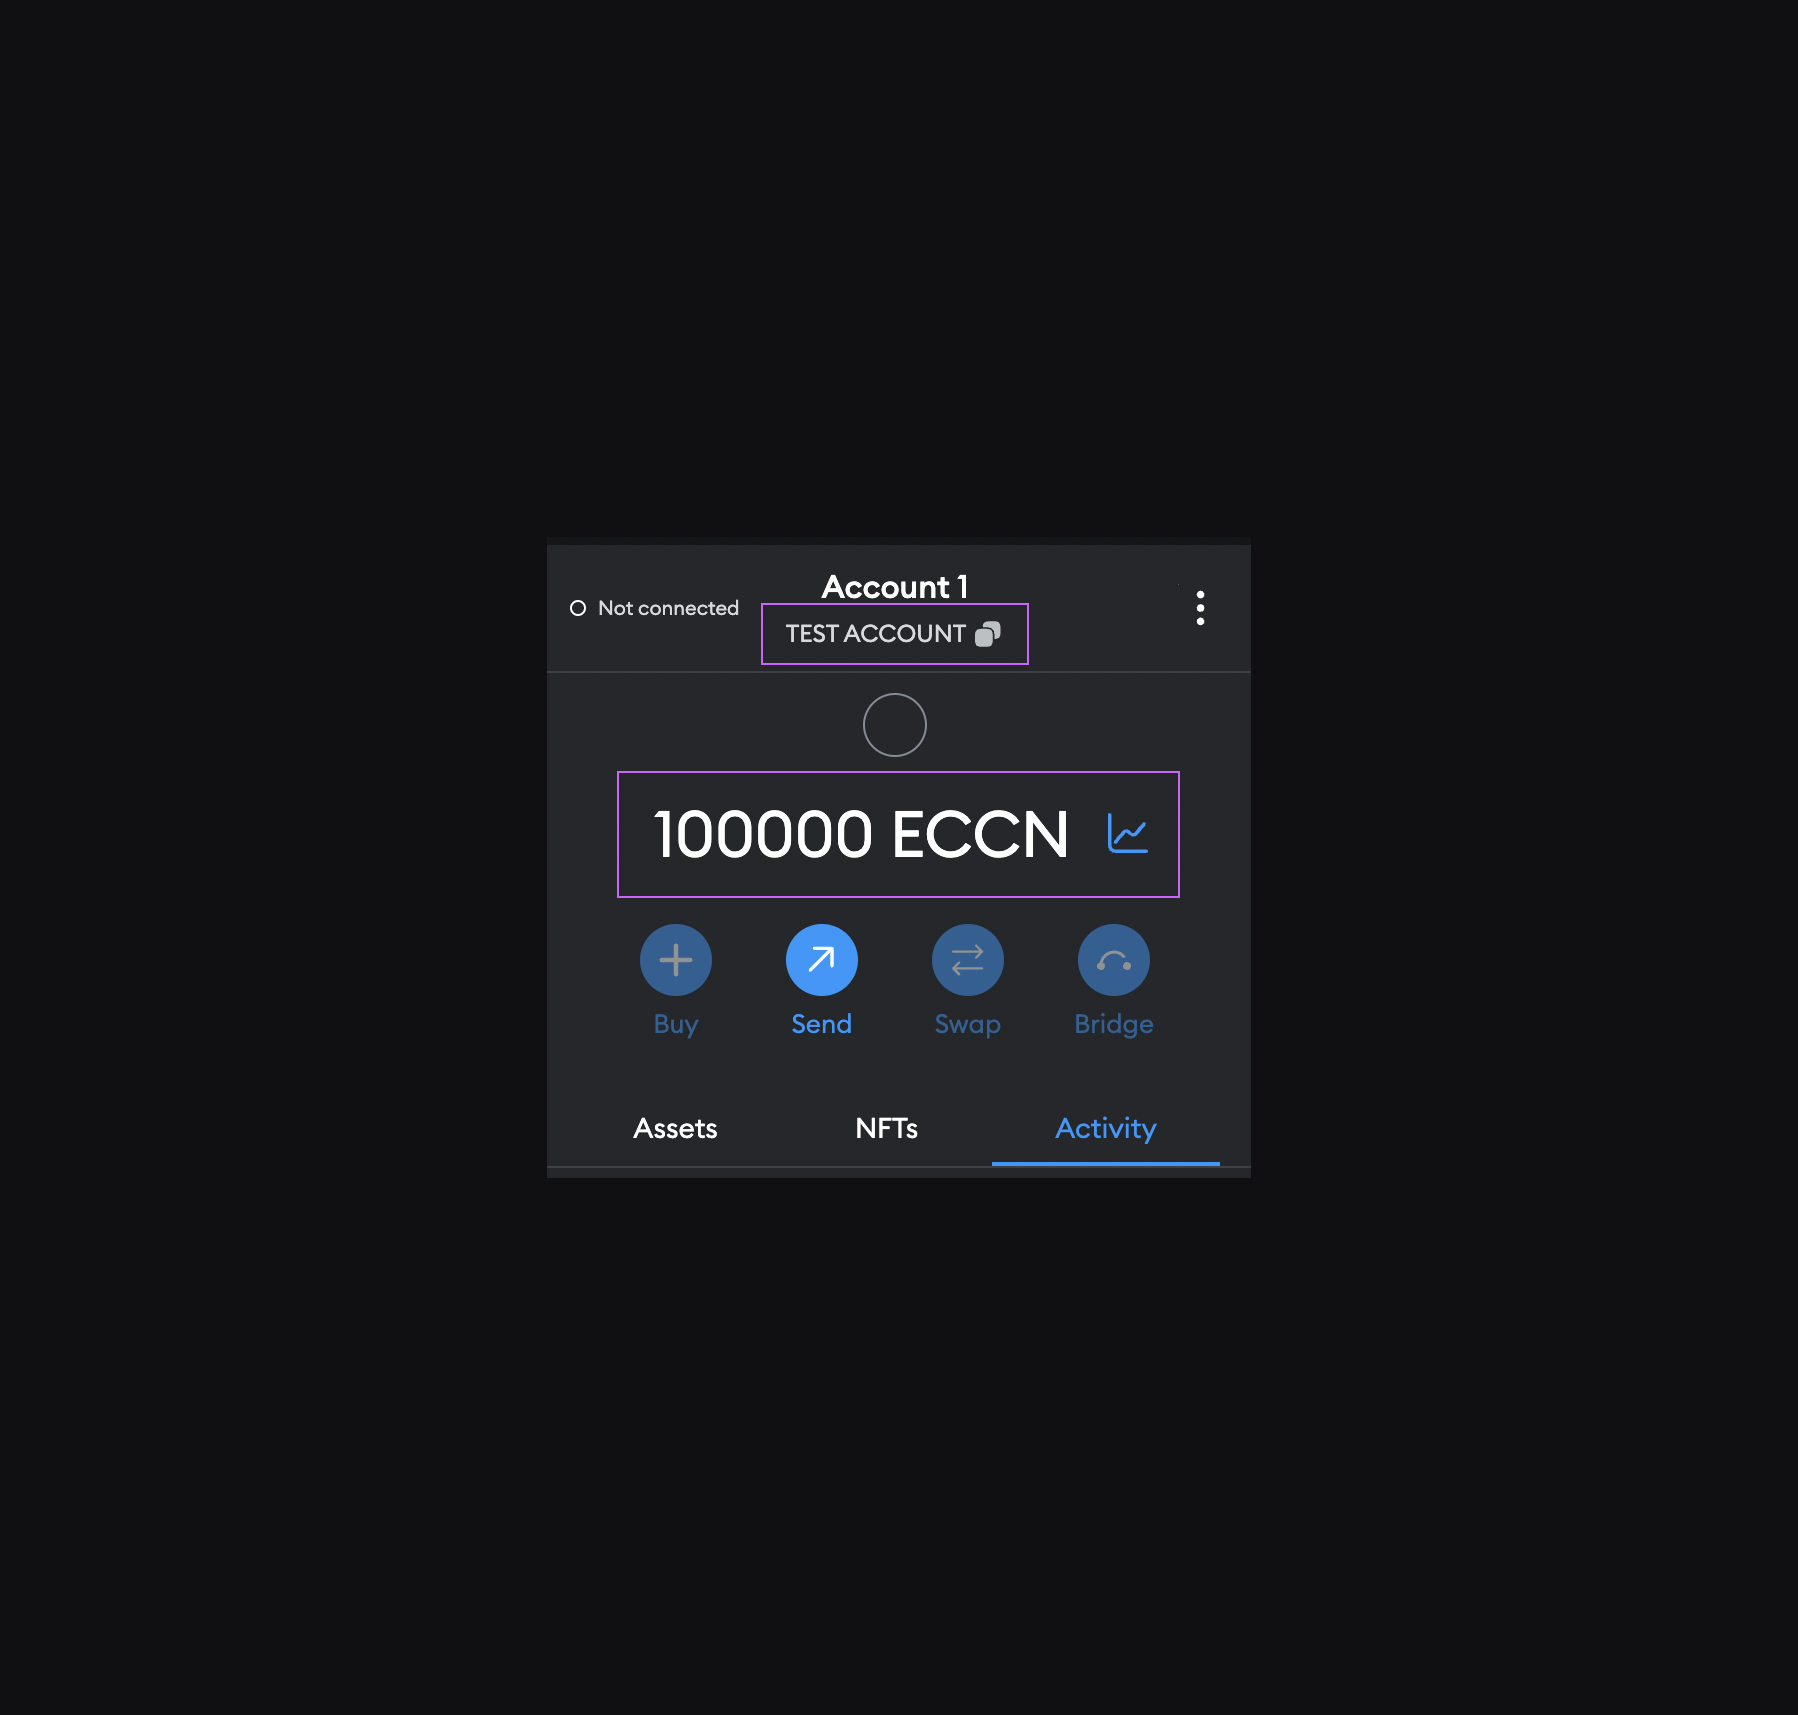
_10Network Name: ECCnet_10RPC: http://127.0.0.1:9650_10Chain ID: 12345678_10Currency Symbol: ECCN
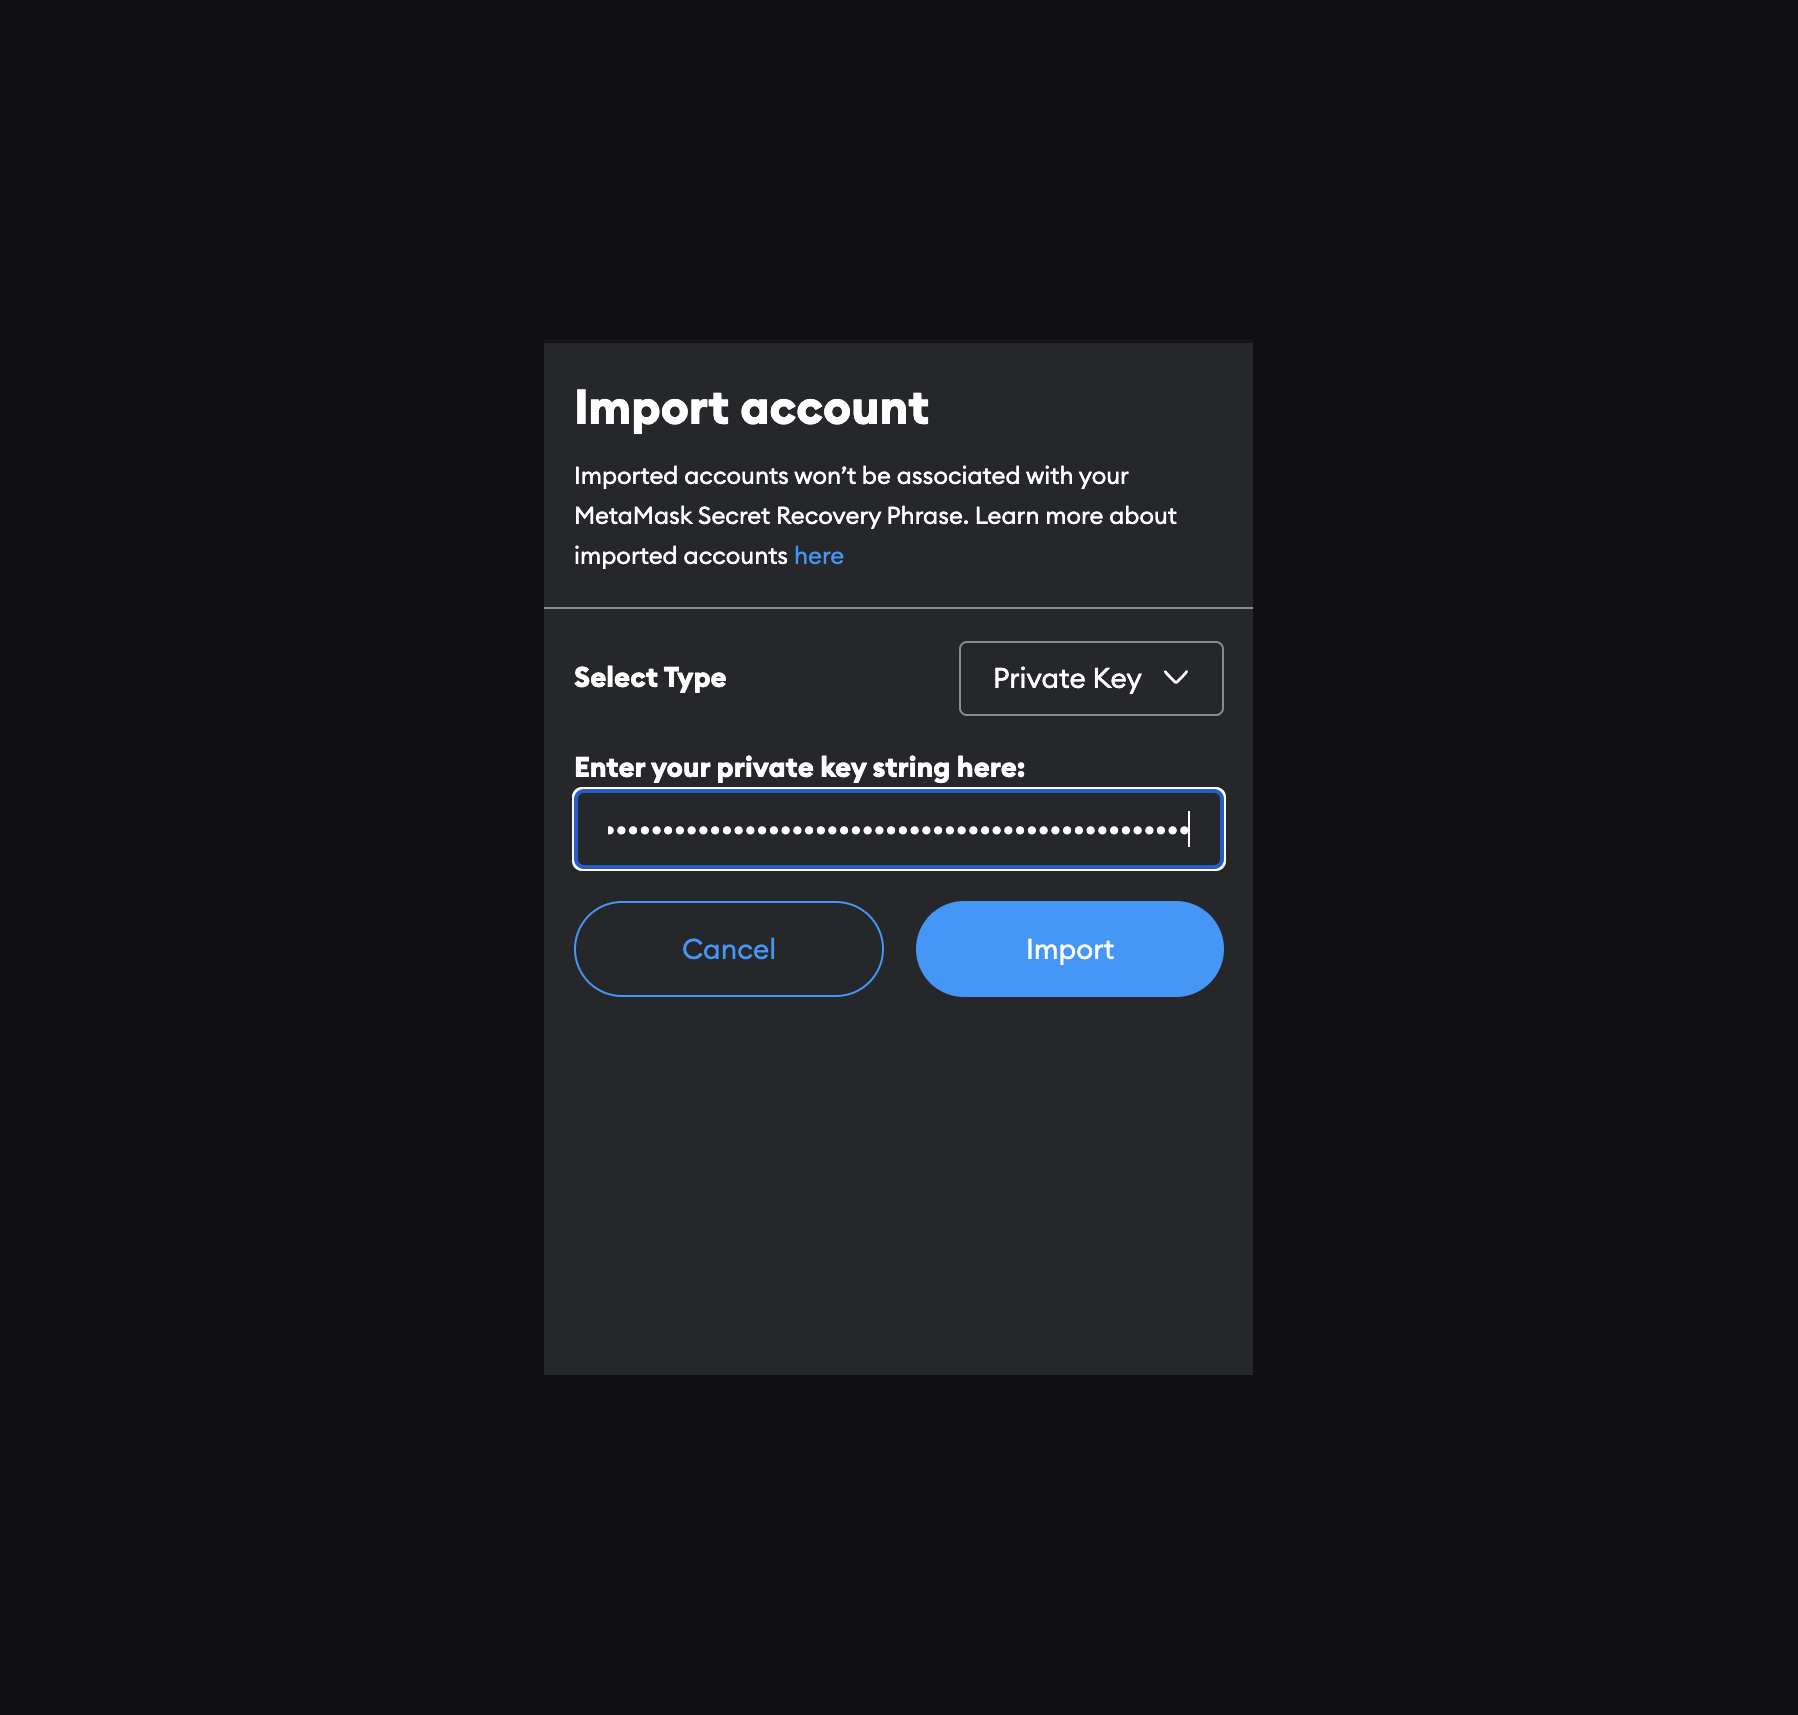
First, you need to import your airdrop private key into MetaMask. Do this by clicking the profile
bubble in the top right corner and select Import account.
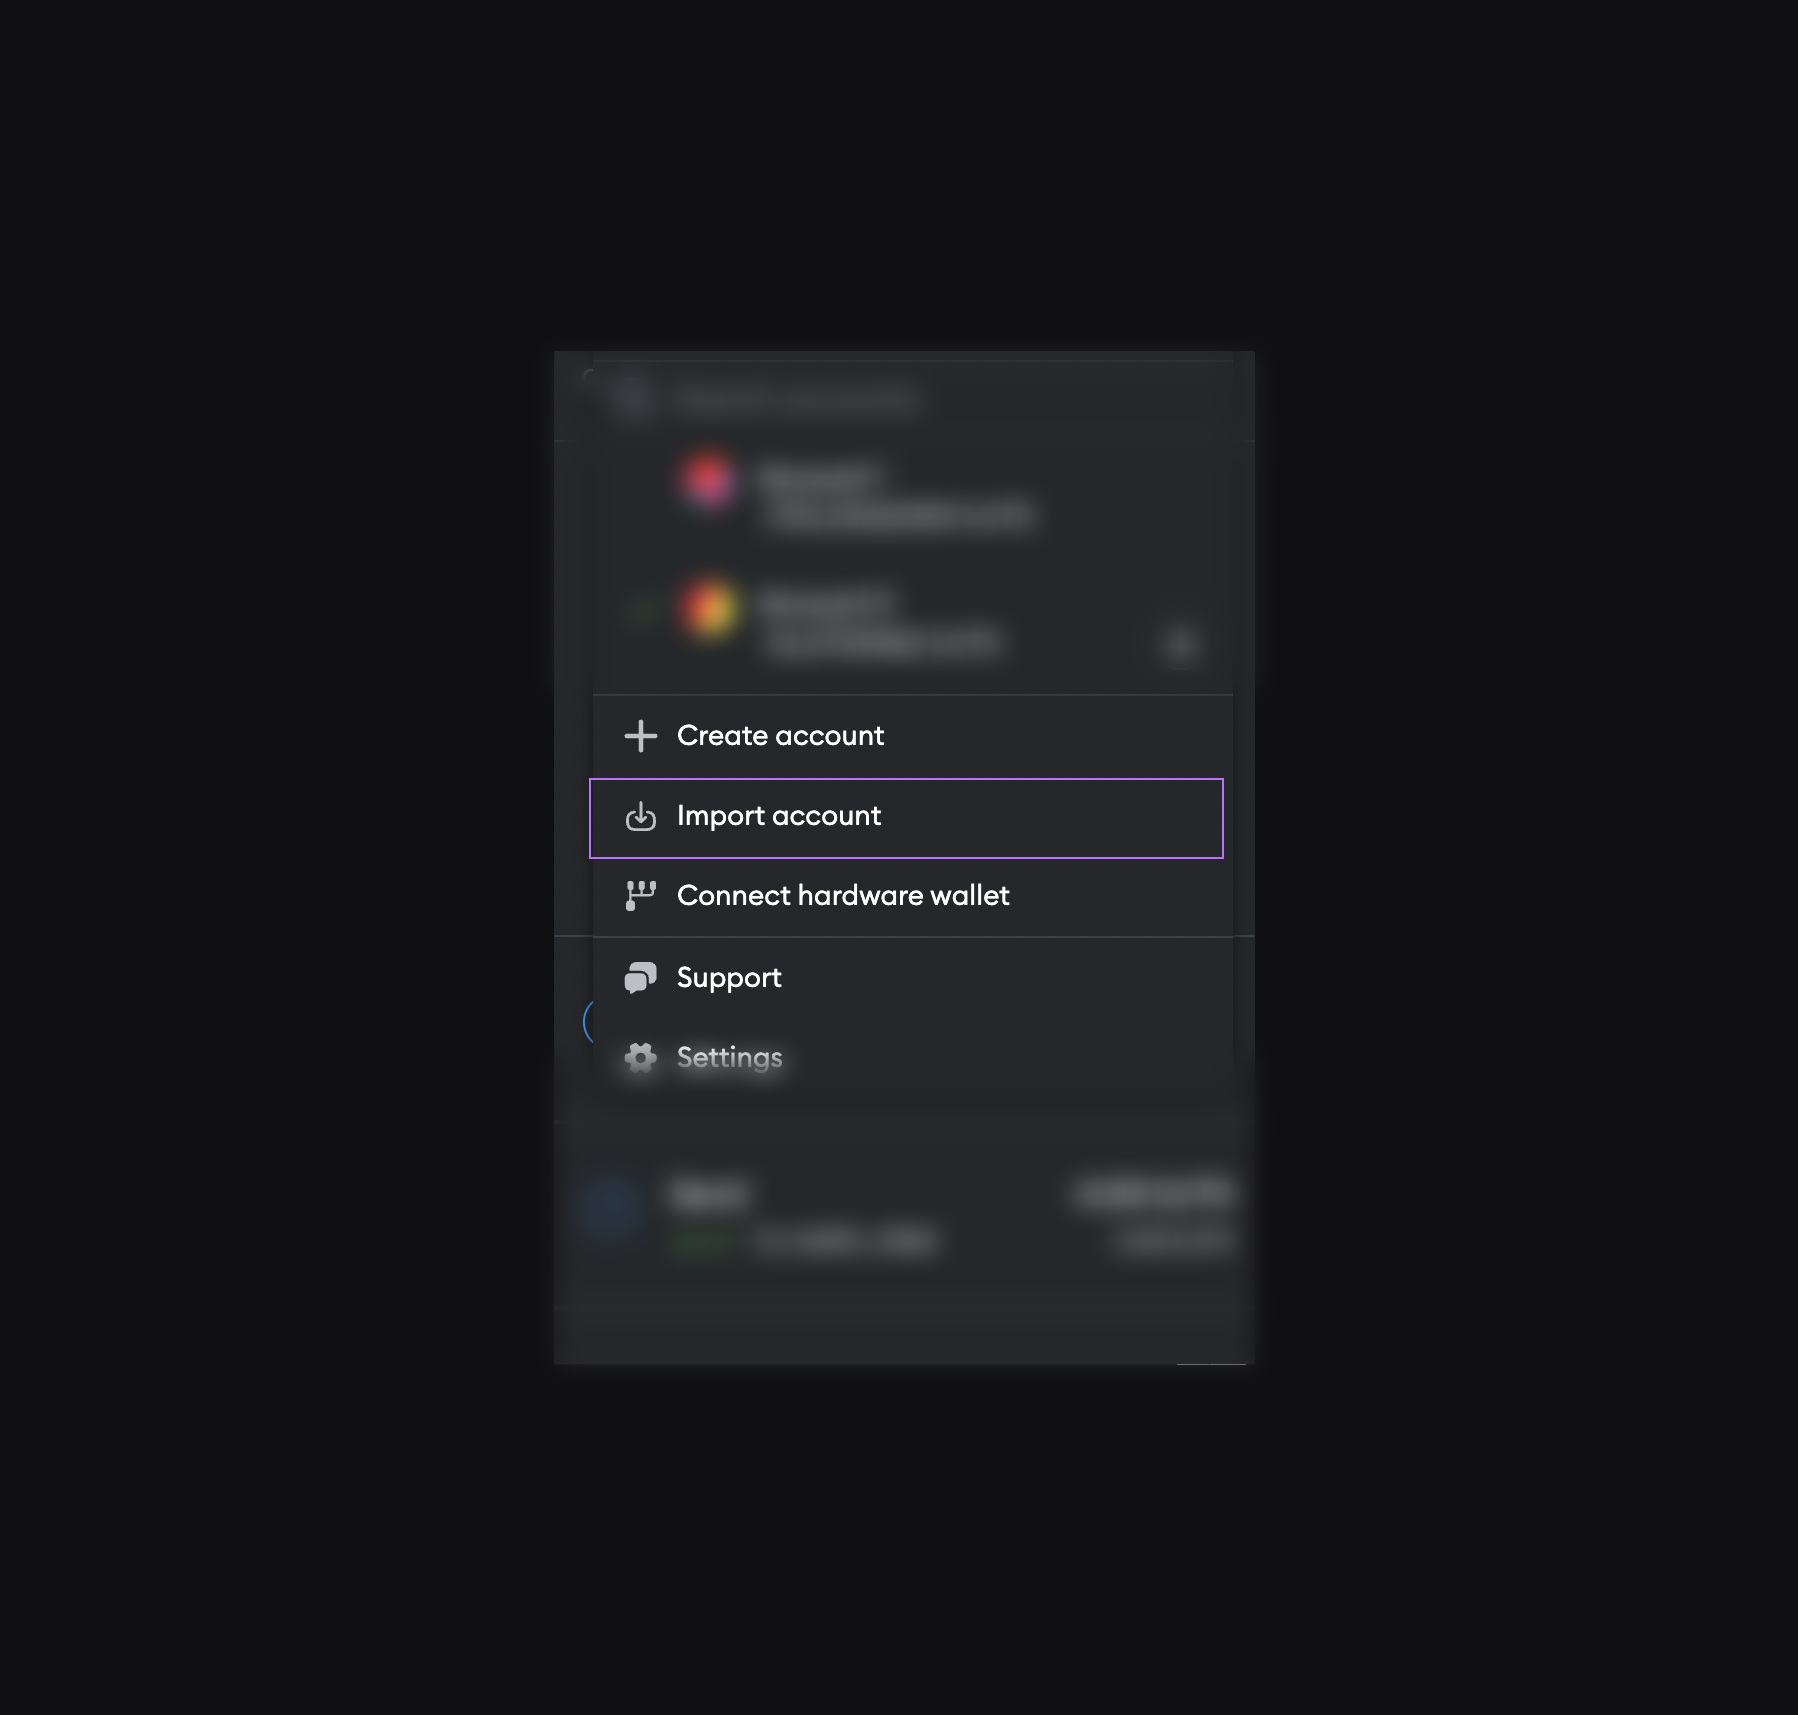
Import the well-known private key 0x56289e99c94b6912bfc12adc093c9b51124f0dc54ac7a766b2bc5ccf558d8027.
Its good practise to change your account name at this time to avoid any confusion. Switch to the new account and click the
three dot menu in the top right corner. Select Account details. Click the edit icon next to the
account's name. And rename the account Test Account ECC or something that you can easily differentiate with your other wallet names.
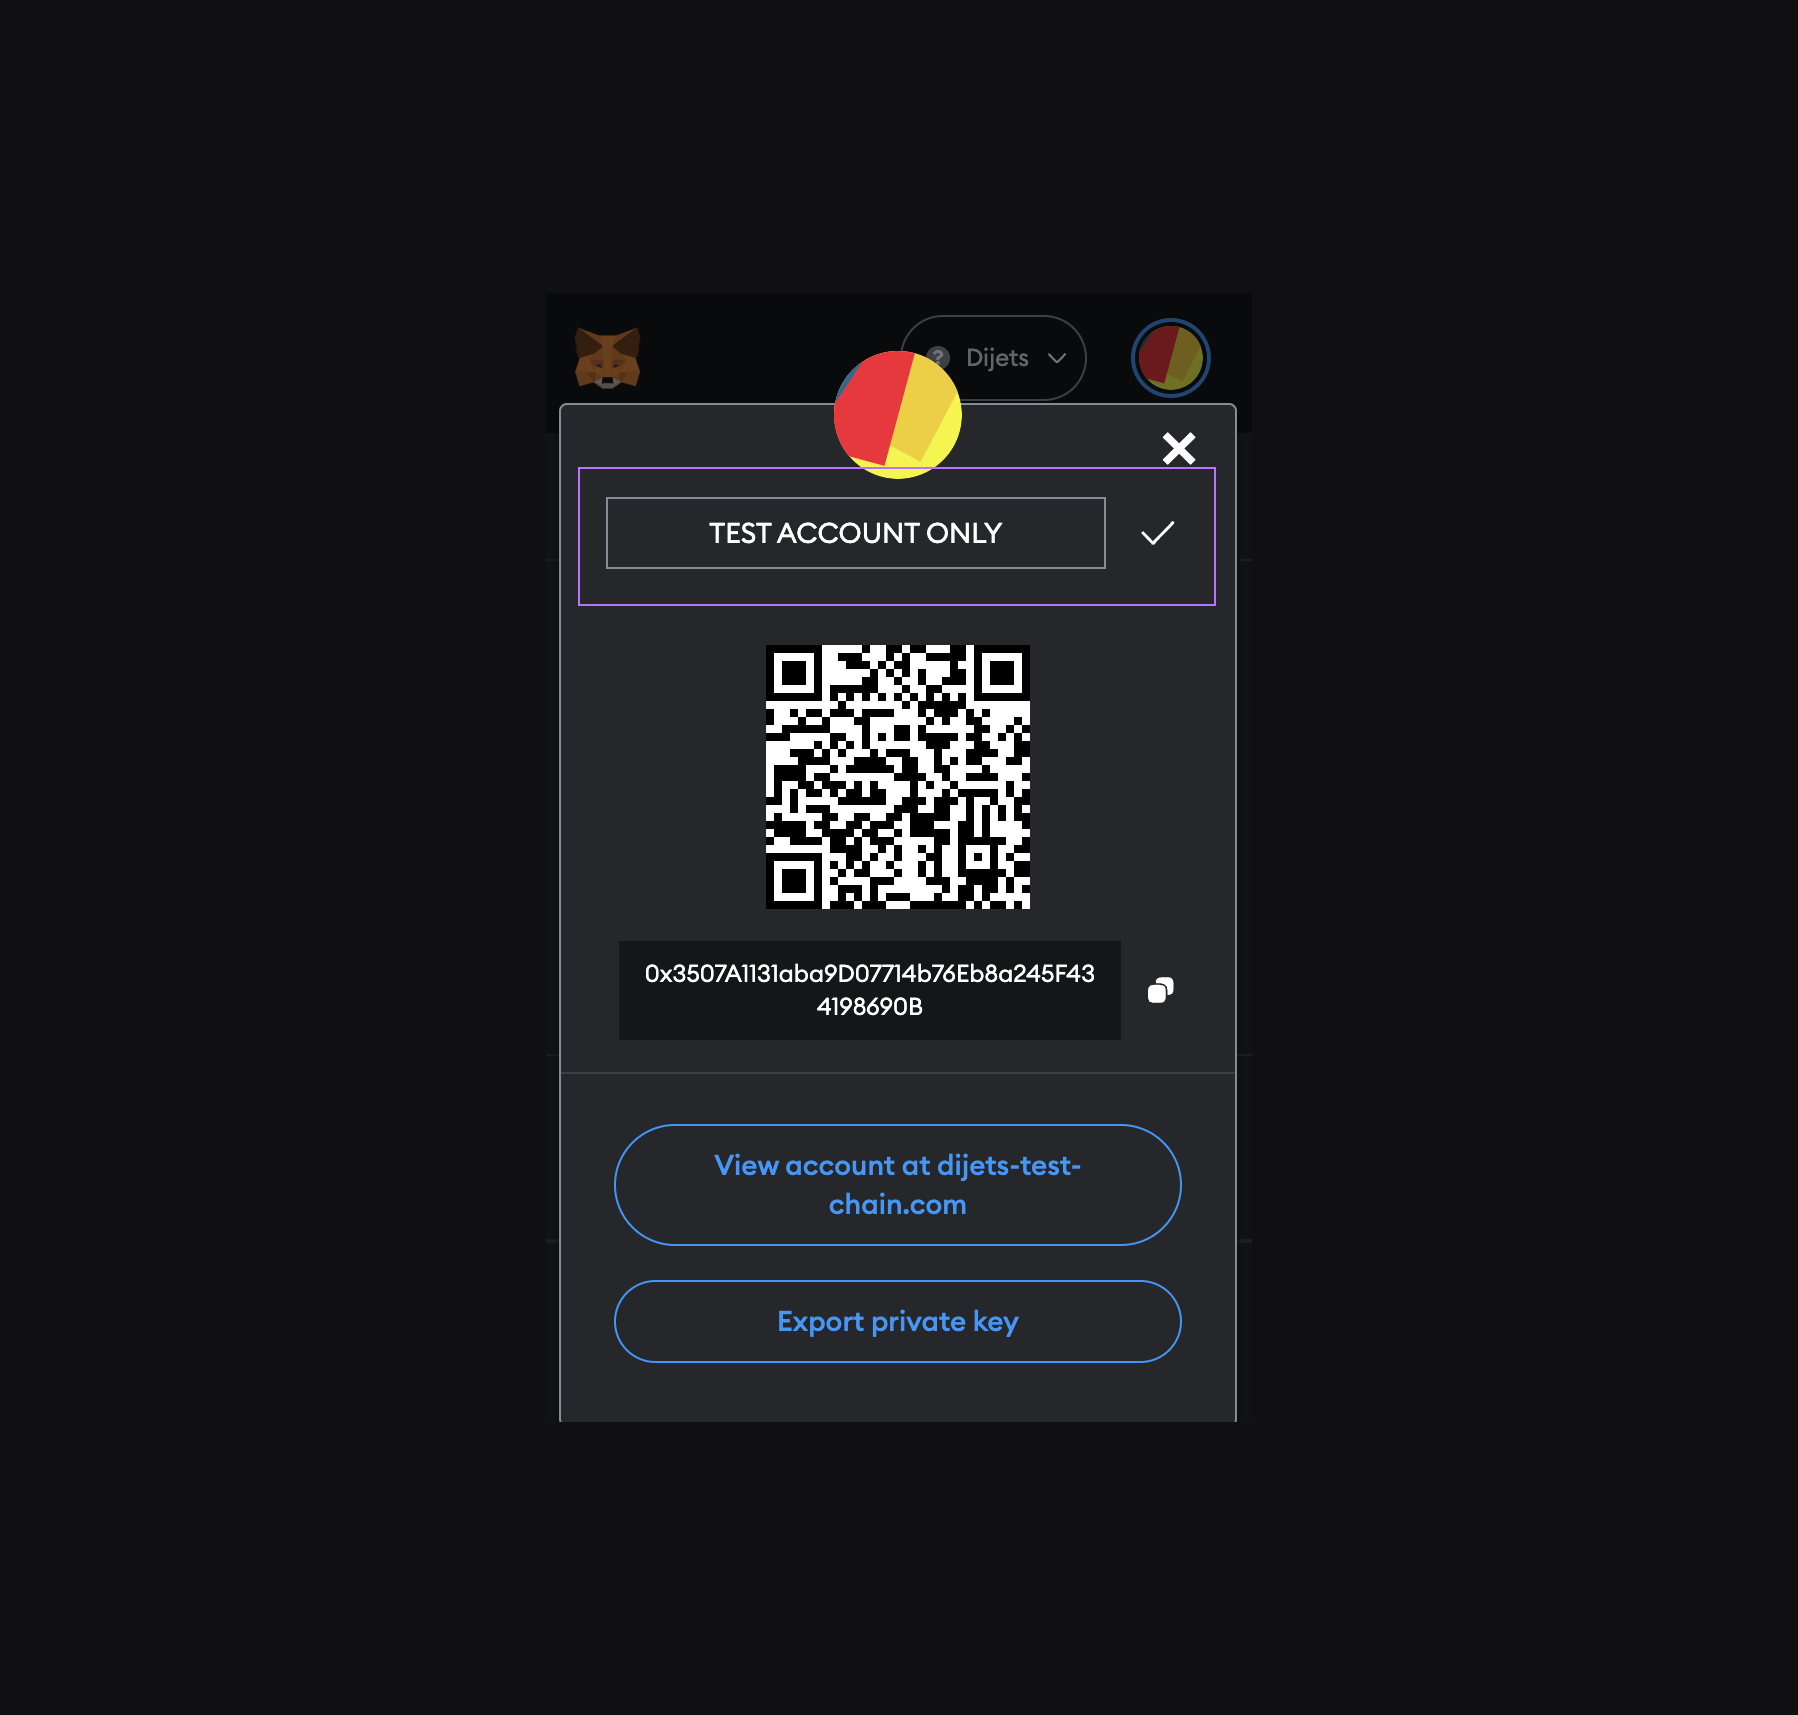
Click the checkmark to confirm the change.
Connect to your ECC#
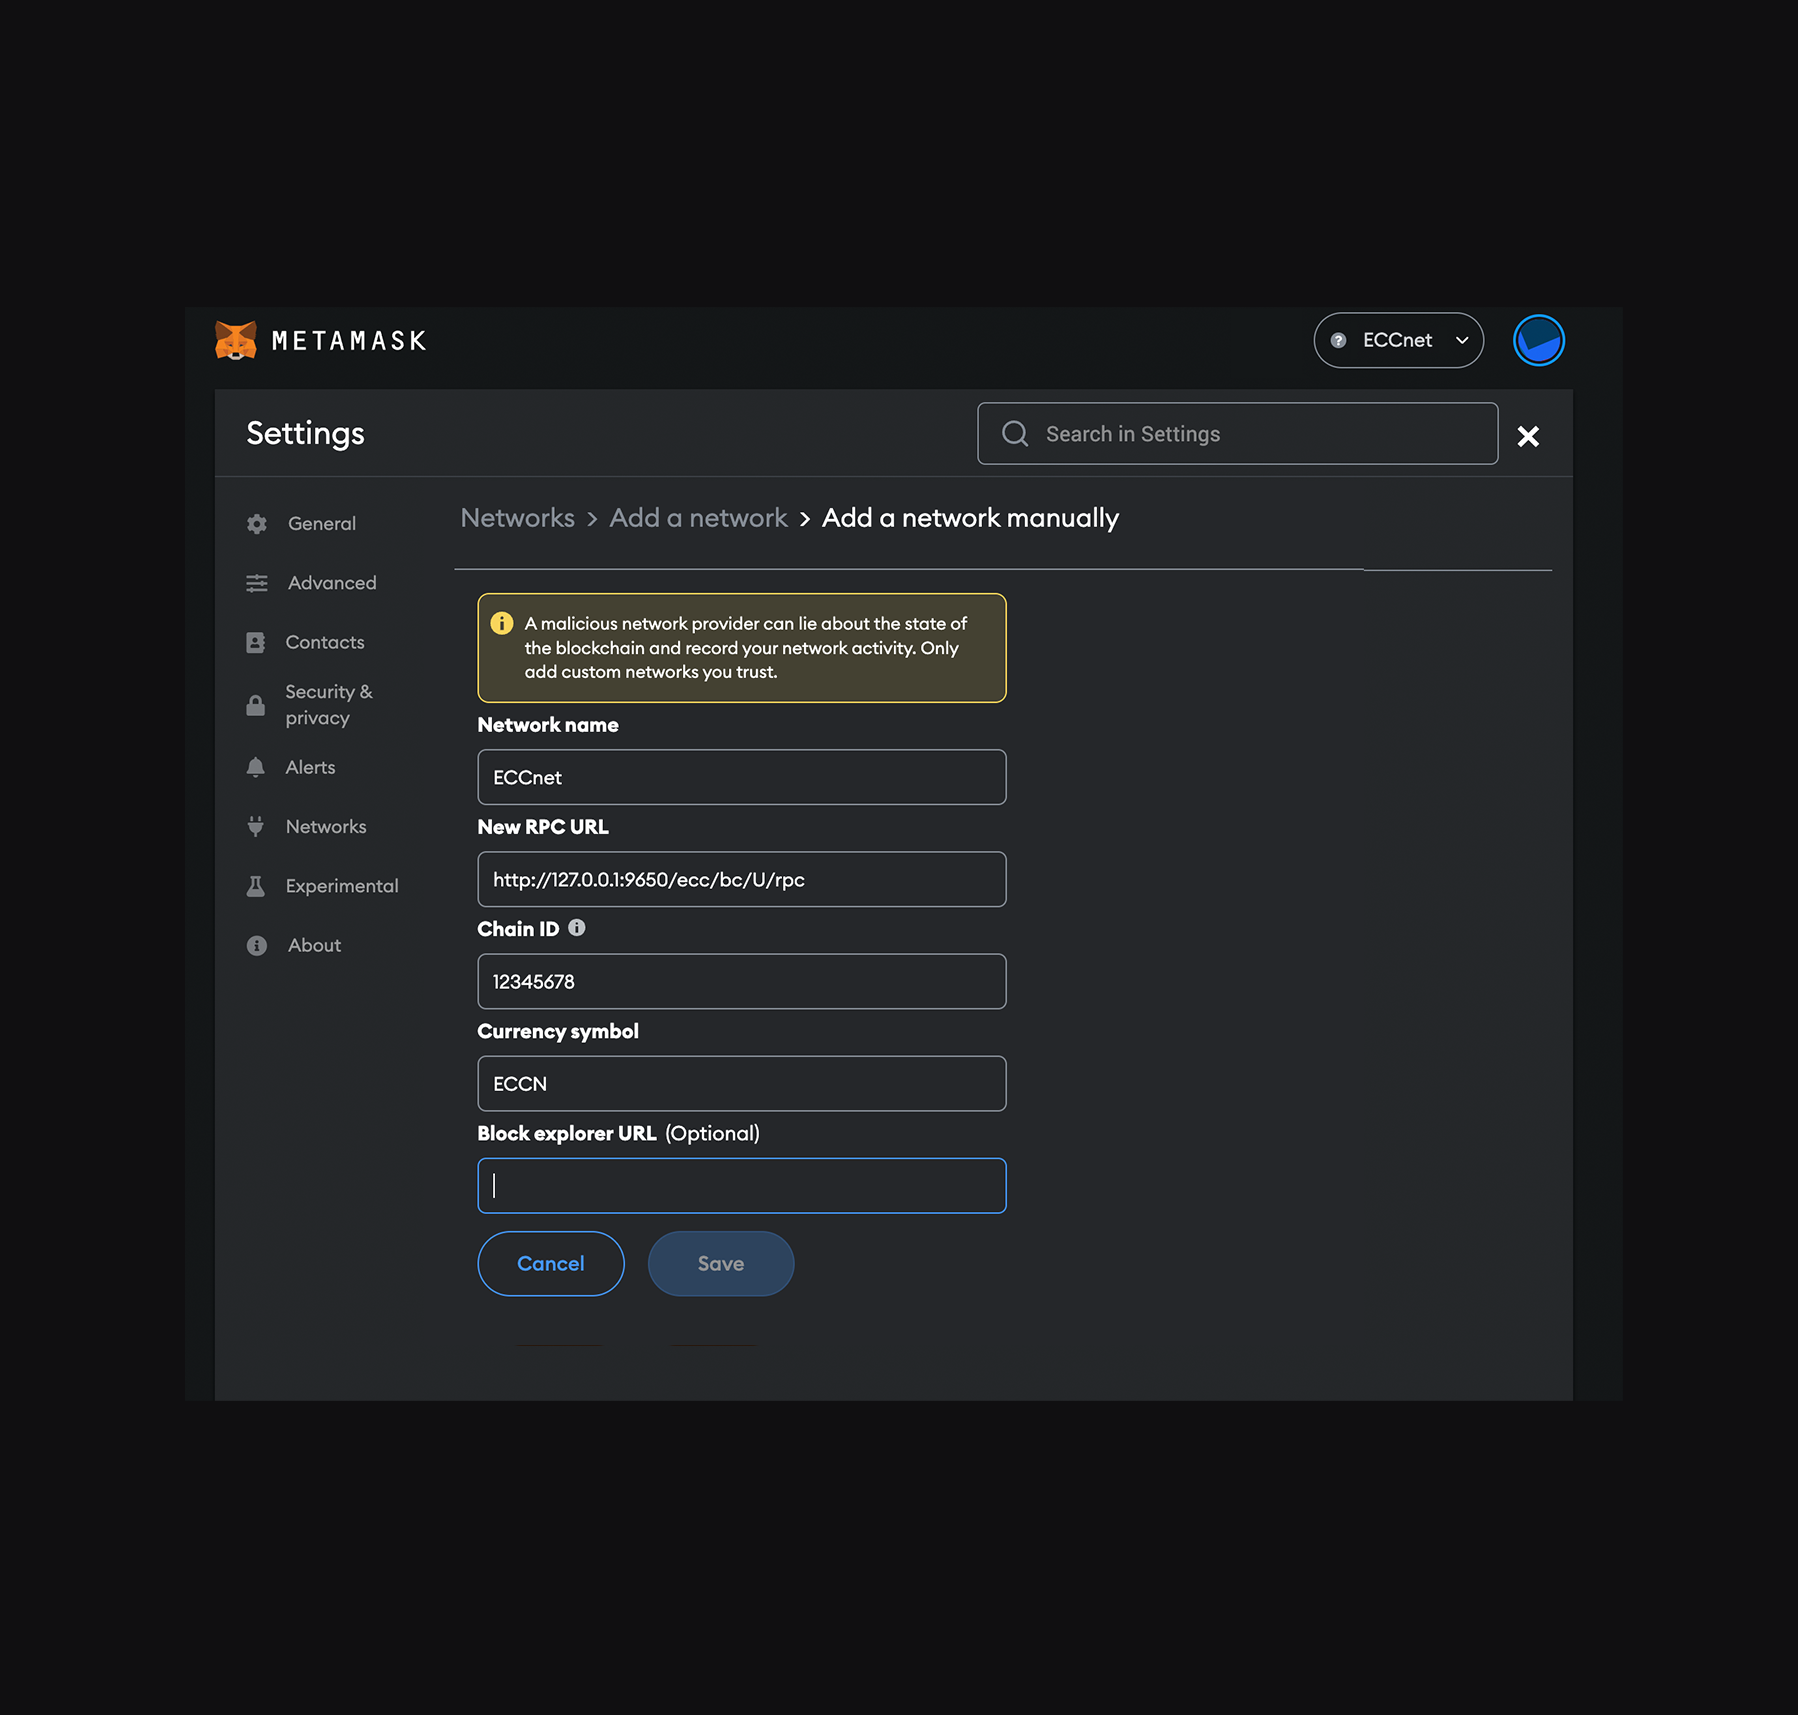
Next, you need to add your ECC to MetaMask's networks.
Click the profile bubble in the top right corner and select Settings. Next, click Networks. Finally,
click Add network.

At the bottom of the next page, select Add a network manually. Enter your ECC's details,
found in the output of your dijets ecc deploy command, into
the form and click Save.
If all worked as expected, your balance should read 100,000 tokens. Your ECC is ready for action.
Next Steps#
Congrats! You just deployed your first ECC. Where you take your ECC, which rule-sets you integrate into it further and which smart contracts you opt to deploy on your ECC are just some of the many options at your disposal now.